Step by Step Guide - How To Plaster Walls
Category: Paint & Decorating Materials
Published: 01/03/2025
Transform Your Space with Smooth, Professional Plastering: A Step-by-Step Guide
Plastering a wall may seem like a daunting task, but with the right tools, patience, and a bit of know-how, it’s a rewarding DIY project that can completely transform the look of your room. Whether you’re preparing a wall for painting or adding a smooth, modern finish, plastering is an essential skill for home improvement. If you’re ready to take on a plastering project, we’ve got you covered with this simple, step-by-step guide.
Step 1: Prepare the Wall
Before you begin plastering, you need to prep your wall properly. The surface should be clean and free from dust, dirt, and any loose particles. If you’re plastering over painted walls, lightly sand the surface to help the plaster adhere better. If you’re working with new plasterboard or drywall, ensure the edges are sealed and any screw heads are covered.
Next, spray a light mist of water on the wall with a water spray bottle. This will help the plaster adhere better and prevent it from drying out too quickly. Plastering over a dry surface can lead to cracks, so it’s important to slightly dampen the area.
Step 2: Mix the Plaster
Now it’s time to mix your plaster. If you’re using ready-mix plaster, it should be good to go, but if you’re using plaster powder, follow the manufacturer’s instructions for mixing it with water. Stir until you have a smooth, creamy consistency with no lumps. Be mindful of the working time – plaster can dry quickly, so only mix as much as you can use within 30 minutes to an hour, depending on the type.
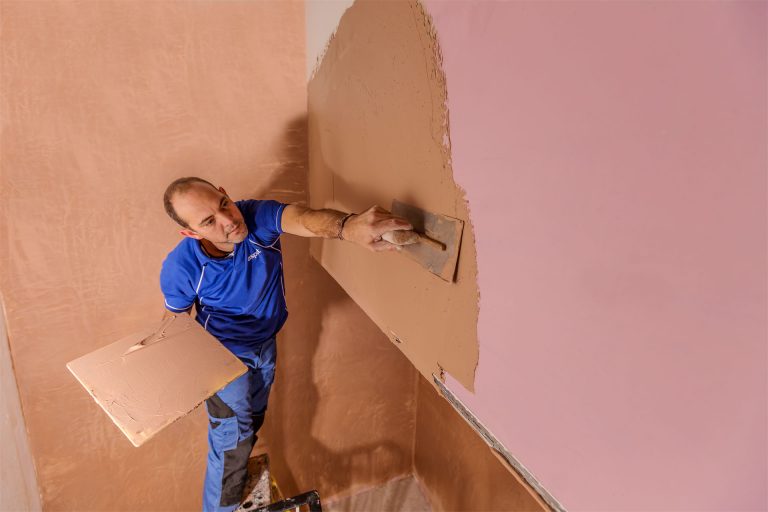
Step 3: Apply the First Coat
Using your hawk and trowel, scoop up some plaster and start applying it to the wall. Begin at the top of the wall and work your way down, using your trowel to spread the plaster evenly. You don’t need a thick layer – aim for a thin, even coat that covers the entire wall.
Make sure to apply the plaster in a criss-cross motion, which helps to distribute the plaster evenly. Work in sections, making sure you have a smooth, consistent layer before moving on to the next section. It’s important to keep the edges of the plaster fresh and avoid letting the plaster dry too much before smoothing it out.
Once you've covered the entire wall, use the plastering float to smooth out the surface. This tool helps to even out any imperfections and gives the plaster a polished finish. Go over the surface with gentle pressure to ensure a flawless texture.
Step 4: Let It Dry and Apply the Second Coat
Allow the first coat to set for about 30-60 minutes, depending on the temperature and humidity of the room. You’ll know the plaster is ready for the second coat when it feels firm but still a bit damp. If it’s fully dry, it won’t bond properly to the second coat.
Apply the second coat in the same way as the first, using the trowel and hawk to scoop and spread the plaster. This layer should be thinner and smoother, and you’ll want to be extra careful with any bumps or inconsistencies.
After the second coat, allow the plaster to dry completely. This can take anywhere from 1-2 hours, depending on the conditions in your space.
Step 5: Smooth and Finish the Wall
Once your second coat has dried, it’s time to do the final smoothing. If there are any rough areas, lightly sand the wall with a fine-grit sandpaper or sanding block. Be gentle to avoid creating uneven spots. If you notice any imperfections, you can apply a third, light coat of plaster and smooth it out with the trowel.
For the smoothest finish, lightly spray the wall with a fine mist of water and use your float to give the surface a final polish. This will help eliminate any remaining trowel marks and leave you with a sleek, smooth finish.
Step 6: Allow to Dry Completely
Once your wall is perfectly smooth, allow it to dry completely before painting. Drying times will vary depending on the type of plaster you’ve used and the climate of your room, but it can take anywhere from 24 to 48 hours for the plaster to fully cure.
Step 7: Paint and Enjoy
Now that your wall is plastered and smooth, it’s time to give it a fresh coat of paint. Use a high-quality paint suitable for newly plastered walls, and apply a primer first if necessary. Once your paint has dried, step back and enjoy the beautiful, flawless finish you’ve achieved.
Final Tips for Success:
- Work in sections: Plastering large areas all at once can be overwhelming. Break the wall into manageable sections and work your way down.
- Keep your tools clean: Make sure your trowel and float are clean to avoid messing up the plaster. Clean tools also make the process smoother.
- Don’t rush: Plastering takes time and patience. Rushing the process can result in a rough finish or cracks. Take your time to get it right.
Conclusion:
Plastering your wall is a cost-effective and rewarding way to refresh your space, and it’s easier than it seems with the right approach. Whether you’re updating a single wall or the entire room, smooth, fresh plaster provides the perfect base for any paint or finish you choose. With a little patience and practice, you’ll be left with a professional-quality finish that transforms your room.
Ready to take on your plastering project? Let’s get started and make your walls smooth and flawless!