HOW TO PLASTER A WALL
Category: General
Published: 04/03/2022
Is it difficult to plaster a wall?
Plastering is a specialist job most people prefer to leave to the experts. But if you feel you are quite handy when it comes to practical DIY jobs and you know how to work in a slow, methodical and neat fashion, this step-by-step guide to plastering will ease you through the job. Hopefully, the finished result will look as if a professional completed it.
First of all, you need to get the right tools and materials for the job. Below is a list of what to shop for in order to be prepared for the job at hand.
What do I need to plaster a wall?
Plastering a wall can take time so it’s important to choose good quality tools which feel comfortable in your hand. The five basic tools are:
- Plastering trowel - choose a stainless steel trowel with a comfortable, evenly weighted handle.
- A plasterer’s hawk board - this is the tool that holds your plaster. A plastic hawk board is lighter than a wooden one, although both types are absolutely fine. A wooden hawk board will last much longer though.
- Bucket trowel - this tool is specially designed to make it easy to scoop plaster from the bucket to your hawk board.
- A power mixer - although it’s fine to mix the plaster by hand, using a power mixer is much easier and quicker. It’s especially suitable if you’re creating large batches of plaster which need to be applied quickly.
- A good quality paint brush - this is essential for keeping your edges clean and applying water to your plaster.
If you re-use tools for plastering, make sure they are spotlessly clean with no plaster residue remaining from a previous job.

Preparation
Before you start working on your walls, lay down a dustsheet to protect your floors and collect any later debris or plaster spillage. Then you need to make sure the area you want to plaster is free from dust and loose debris. This is especially important if you are plastering an older existing wall. You also need to cover any holes and cracks you may find. You can use screen tape for this. If you are plastering over newly erected plasterboards, use screen tape to mask all the joints between the boards.
Apply PVA to walls
Using PVA for bonding creates the best result and ensures that the layer of plaster you are applying later on will dry out evenly. Dilute the PVA in a 1:4 ratio – one part PVA and four parts water. Roll or brush the PVA mixture onto the wall and make sure the entire wall is covered. The first layer of plaster can be applied straight afterwards as long as the PVA glue has become a bit sticky. For the best result, always follow the instructions given by the manufacturer of the glue.
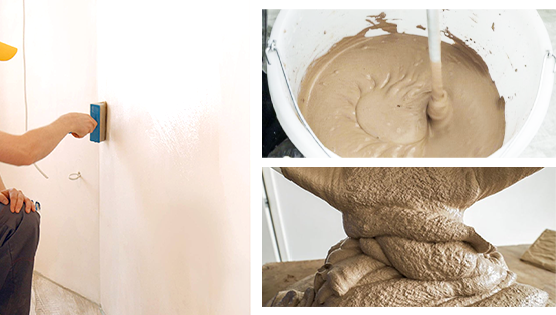
Mix plaster
Make sure to wear a dust mask before you open up the bags of plaster. Mix the plaster into cold water, whisking briskly until it has the consistency of thick custard. There should be no lumps. Always mix the plaster into the water and not the other way around.

Apply plaster
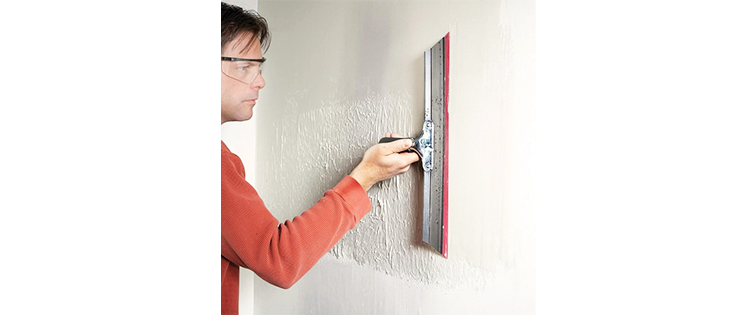
Now you’re ready to apply your first coat of plaster using the hawk board, the trowel and the float. You might want to practice the movement on separate plasterboard before you start the actual job to make sure you are getting the technique right.
First of all place plaster on the hawk board using the trowel. You then use the float to push the plaster from the hawk onto the walls. Do this with the float close to the wall, spreading the plaster firmly upwards and flattening the float at the end of each sweep. You should work from the bottom left-hand corner and upwards, filling a section from bottom to top before you move on to the next section. Use small amounts of plaster each time in combination with lots of pressure on the float, as this is the best way to ensure a smooth look and avoids excess plaster falling off the wall. Repeat the procedure until the entire wall is covered.
Skim and smooth
After the first coat of plaster has been applied, wait approximately 20 minutes in order to let the plaster dry slightly. You can then get rid of lumps and bumps by smoothing over with the trowel. You also need to smooth out all the corners and ends such as the bottom and top of the wall. These are usually difficult areas to plaster correctly. Use a wet brush to even the edges out.
Apply plaster
After applying the first level of plaster you can apply a second and final coat. This should be of a thinner consistency than the first coat so make sure to dilute the plaster mixture with some more water. Aim to only plaster a thin 2 mm layer. Then leave the plaster to dry slightly.
Finishing touches
After the plaster has dried slightly you need to polish up your work. You do this by adding water to the surface using a spray gun. Spray the edges of the plaster and run the trowel over it to smoothen out the surface. Use inward strokes when doing this. You can also use a wet brush for the job, especially around the tricky edges. Finish by running a clean float over the entire surface to flatten out any lumps and bumps.
After the plaster has dried out completely, you can use some sanding paper to remove any excess plaster you may find.
Painting and wallpapering
Once the plaster is completely dried it’s ready to be painted or wallpapered. Before you paint over the new plaster you should use an undercoat in order to prime the surface. The same is the case if you’re hanging wallpaper, although in this case you would use wallpaper adhesive. Apply one or two coats of adhesive to prime and seal the surface.