For those who intend to take the DIY approach, building decking can be a daunting and complicated process, especially if you’re a beginner.
Here is a guide to start your first build and hopefully this will help you have something long-lasting and a deck you can show off to family and friends.
Step 1 – Prepare the Garden Area
It’s important to properly prepare this ground beforehand so as to prevent any issues in the future.
If you don’t intend on utilising an under-deck drainage system (which can often be very costly) it’s recommended that you build your deck on an oversite which is free draining. Using grooved boards which run down the slope of your build will help any rainwater to naturally drain from your decking surface. If these run across your slope, they may collect rainwater & increase the moisture content of your boards.
- Fix pegs in the ground, marking out the corners of your deck. Use a builder’s line or string to attach the pegs and mark out the square dimensions of your structure.
- Within these dimensions, clear away all rocks, weeds & vegetation. Some might choose to remove the turf with a spade, though this is not always necessary. This exercise can help to rebalance your surface if you do not have a natural slope on which to build your deck.
- Use weed killer spray on the oversite to prevent any growth in the future.
- Measure out & cut a weed barrier sheet into sections so that it covers the entirety of your oversite. If you are setting footing posts for your deck, you’ll need to leave space for these.
- You can then move onto building the deck frame.

Step 2: Building The Deck Frame
Laying a raised deck frame by setting a footing is probably the most popular method by which to build a deck & for good reason. It gives the structure a solid footing which is incredibly strong & durable. This helps give the deck a longer lifespan as the structure is securely fixed; it also raises the frame above ground, preventing the absorption of rainwater.
You should follow these steps when setting their footing –
First, you should construct your outer frame. Joists should be fixed together along the perimeter of your oversite, which should be marked out with builder’s line.
Once you have the positioning of your frame correct, you can mark out where your posts need to sit. There should be between 1m – 1.5m spacing between each post, ensuring these sit at regular intervals so as to provide enough structural support.
Fix posts to your frame, screwing them to the inside of the timber. Use at least three screws per post.
Remove the frame and dig out the holes you previously marked with a trowel. These should measure roughly 30cm in both depth and width. Decking which is raised off the ground will require deeper footings – the higher the deck is raised off the ground, the deeper the holes should be.
Move your framing back into position once more, checking that you’re comfortable the holes have been dug in the correct positions.
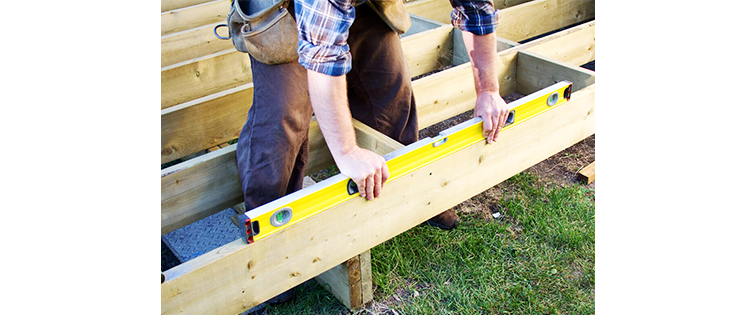
Check the positioning of your frame. You should use a spirit level to make sure that the outer frame is flat, but is sloping away from your house or adjoining building by a gradient of at least 1 in 40.
Pour concrete into the bottom of each footing, ensuring sufficient depth to fix the frame in place. The concrete should be left to set for at least 7 days before any further work is carried out on the build.
If this wasn’t already done during the construction of your outer frame, beams should be fixed onto every post along the longest length of the deck. A pair of beams should be bolted or screwed to either side of the posts for maximum deck strength. Beams should be spaced at maximum centres of 1.5m.
At this stage, your build can move on to fixing the joists.
Step 3: Fixing Your Joists
At this stage, we can now begin fitting the joists. These are the long bits of pressure-treated timber which sit between (and attach to) the outer frame. They provide the main support for your deck boards.
The recommended spacing between joists depends on whether you intend to position your boards horizontal or diagonal. The centre spacing between joists for horizontal boards should be 400mm, while the spacing for diagonal boards is slightly less at 300mm.
For a basic, small deck, you can probably get away with using just three joists. One placed centrally with the other two positioned at centres between the outer frame and the central joist.
You should attach your joists to the outer frame using joist hangers & galvanised nails. A nail gun works incredibly well for this, though an electric drill will suffice. When fitting you should check that all of your joists & the outer frame come together at right angles. You don’t want to end up with a wonky deck!
For large structures with complex joist configurations, it’s recommended that noggins are used. These are small bits of wood fitted perpendicular to adjoining joists which add rigidity to the deck frame.
Step 4: Fit The Decking Boards
Once the load-bearing frame to your deck has been built, we can move on to laying the decking boards. Fitting will vary depending on what material you have chosen for your boards.
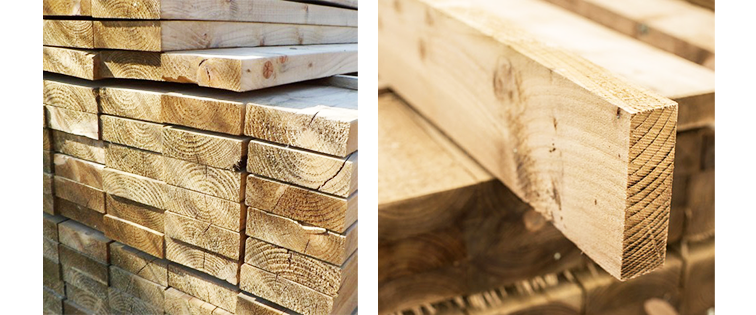
If you have chosen wooden decking boards, you should allow them to dry out & acclimatise for around one week before fitting. Often boards will have been stored in warehouses or lumberyards where the temperature and moisture levels may have been variable. This will allow your wooden boards to reduce in moisture content & shrink down to their normal size – rather than this happening once your boards have been fitted (which can lead to big gaps between your boards).
To begin laying the boards of your deck, position the first board to the edge of the frame closest to your building. When positioning your next board, you should leave a small gap for expansion during wet weather, though not so large so as to create a large gap should your boards shrink. 3-5mm is normally ample width to allow for this – roughly the width of a fixing screw. This gap should also be left between your deck boards and newel posts.
Where you have had chance to dry out your boards prior to installation, you should leave between 7-10mm gap between boards. This will allow plenty of room for expansion during wetter periods.
It is recommended that you position all the boards of your deck on your frame before fixing anything in place. Once you’re happy that your boards are positioned beautifully & the deck frame is sufficiently covered, you can move on to fixing these in place.
Each board should be fixed at all four corners. If you are installing hardwood, wood-plastic composite or PVC boards, you should pre-drill your holes – rather than hammering nails into the wood which can cause cracks or splits in the decking material. You should also fix your boards at the centre where they pass over joists or noggins. This will fix the boards in place and give the structure added durability.
Continue to work through your boards. When you reach the edge of your structure, you will likely need to measure & cut your boards so they fit into the frame. Many choose to overlap the deck frame & then cut the boards to the desired length once they’ve been screwed into place.
Deck framing - edging the deck
At this stage you should also fit the deck frame facing – sometimes known as ‘edging the deck’. Wherever there is an edge to the frame which is exposed & visible you should look to attach your decking boards. For the facing, you should measure the outer edge of your frame & find suitably sized boards to fit along the outside. Countersink the facing and screw to the frame, making sure that the deck facing is flush with the top face of your decking.
Step 8: Build & Attach The Steps
If your deck is elevated and there is a big drop from its surface to ground level, you will need to install steps. This is both for practicality & accessibility – as well as helping to ensure that your deck conforms to UK building regulations.
The frame for the steps themselves are often referred to as a ‘stringer’. It helps to construct your steps separate to your deck & attach them afterwards.
Many decking manufacturers will construct stringers, treads & risers which are pre-built to specific measurements to that they fit together easily. Generally, buying these is not a bad idea & much easier than building your own. However if you’re looking to save money it’s worth looking at building your own. We’ve detailed the steps for a full DIY build below.
.png)
First, follow these steps to construct your stringer –
Measure the height of your deck frame. This will help you understand what the height of your steps will need to be.
To calculate how many steps you’ll need, it’s advisable to divide the overall deck height by the average height of each step. This will also give you the height required for each riser. You should also calculate the depth of your treads.
Mark on your stringer where each riser & tread will need to sit. This can be done using a ruler to mark the height of each riser from bottom to top. You will need to account for the depth of the treads and factor this into your markings.
To calculate the edges of your riser, subtract the depth of your tread. These will form the lines where you need to cut your risers so they fit nicely into the stringer.
At this stage you should also mark out the position of the front edge of the very first tread. To work out the edges of the tread below, subtract an overhang of the tread depth. You will not need to do this for the step which connects to the decking.
At this stage you can then subtract the thickness of the risers. Draw this onto the stringer as vertical lines so you know where to cut. At this stage you should also mark out the front edges of the treads.
Connect all your horizontal & vertical lines. These should form the shape of your stringer. Ensure that all your lines are at right angles, or your tread & risers might not fit flush.
Once you have your outline fully drawn out, you can cut your timber with a handheld saw or (ideally) a jigsaw. For the second stringer you can simply use this as a template by drawing around it with a pencil on a new piece of timber. You will need to treat any newly sawn edges that will be exposed to the outdoor weather.
Once you have both sides of your stringer complete, you can move onto constructing your deck steps –
First, lay paving slabs or lawn that will sit underneath the ground leading up to your deck.
You can then look to fix both of your stringers to your deck frame. These should be fixed using galvanised decking nails. They can also be fixed to the ground – using an angled bracket to fix them to concrete or paving slabs.
Next, fit the riser boards, again using galvanised decking screws.
Finally, screw the decking treads to the stringer, using two nails at each end. Ensure the treads are firmly attached as loose treads can pose a safety risk.
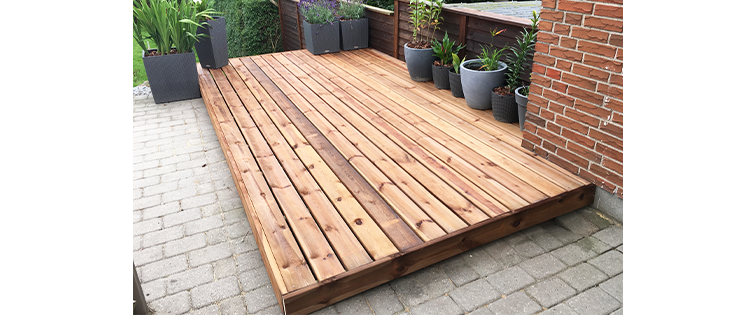
That’s it! You’ve successfully built a deck yourself. Don’t forgot to protect the decking so your hard work lasts for longer.